
Photo by Rubaitul Azad on Unsplash
Simplify Your Email Workflow: How to Set Up Gmail to be used with Action Mailer
Problem
How to set up Gmail to be used with Action Mailer
Introduction
In today's fast-paced digital world, email remains a fundamental tool for communication. Whether you're running a personal blog or developing a robust web application, being able to send emails from your application is crucial.
In this article, we will guide you through the step-by-step process of configuring Gmail to work smoothly with Action Mailer. By the end, you'll have a streamlined email workflow that allows you to send emails effortlessly from your Rails application using your trusted Gmail account.
This article is focused on the configuration of gmail.
Say goodbye to a complicated setup and hello to an efficient email experience. Let's dive in and simplify your email workflow with the perfect integration of Gmail and Action Mailer.
Basic introduction
Gmail
Gmail is a popular email service provided by Google. It is a free web-based email service that allows users to send and receive emails using their web browser or through third-party email clients that support protocols such as POP and IMAP.
Since it is so popular, we're going to configure gmail in order to be used with Action Mailer.
Action Mailer
Action Mailer is a component of the Ruby on Rails framework that enables email functionality within Rails applications. It provides a way to send and receive emails, as well as generate email templates and handle email-related tasks such as attachments, layouts, and views.
Action Mailer was introduced in the early versions of Ruby on Rails and has been a part of the framework since its inception, which was released in December 2005 (Rails 1).
Solution
Detailed Steps
Identify the environment
Set the delivery_method
Configure smtp settings
Generate Google app password
Finish smtp settings
Identify the environment
This step refers to determining the specific environment in which your Rails application is running. In a typical Rails application, there are different environments such as development, test, and production. Each environment has its own configuration settings, including email settings.
When setting up Action Mailer, it's important to identify the environment you want to configure. This helps ensure that the email configuration is applied correctly based on the specific environment.
The main configuration file for each environment is typically located in the config directory of your Rails application. The file names are usually development.rb, test.rb, and production.rb for the respective environments.
In our article, we're going to use the development environment.
Set the delivery method
It refers to configuring how Action Mailer delivers emails. Action Mailer provides different delivery methods that determine how emails are sent from your Rails application.
The delivery_method setting is typically specified in the configuration file for the specific environment you are working with, such as development.rb, test.rb, or production.rb. In our article, we're going to use the development environment.
In addition to SMTP, Action Mailer also supports other delivery methods such as :sendmail, :file, and :test. Each delivery method has its own configuration requirements and behaviors. We're not going to cover these other delivery methods supported by Action Mailer.
Inside config/environments/development.rb, insert the following code:
# config/environments/development.rb
config.action_mailer.delivery_method = :smtp
The code should look something like this
# config/environments/development.rb

Rails.application.configure do
  config.action_mailer.delivery_method = :smtp

end
Configure smtp settings
# config/environments/development.rb

Rails.application.configure do
  config.action_mailer.delivery_method = :smtp

  config.action_mailer.smtp_settings = {
    address:     "smtp.gmail.com",
    port:     587,
    domain:     "domain.of.sender.net",
    authentication: "plain",
    user_name:     "myemail@gmail.com",
    password:     "secret_password",
    enable_starttls_auto: true
  }
end
The previous template refers to setting up the necessary configuration for Action Mailer to connect to an SMTP (Simple Mail Transfer Protocol) server and send emails using that server.
SMTP is a standard protocol used for sending emails over the Internet. To configure SMTP settings, you need to provide specific information about the SMTP server you want to use, such as the server address, port number, authentication credentials, and any additional settings required by the server.
Generate Google app password
It refers to setting up the necessary configuration for Action Mailer to connect to an SMTP (Simple Mail Transfer Protocol) server and send emails using that server.
SMTP is a standard protocol used for sending emails over the internet. To configure SMTP settings, you need to provide specific information about the SMTP server you want to use, such as the server address, port number, authentication credentials, and any additional settings required by the server.
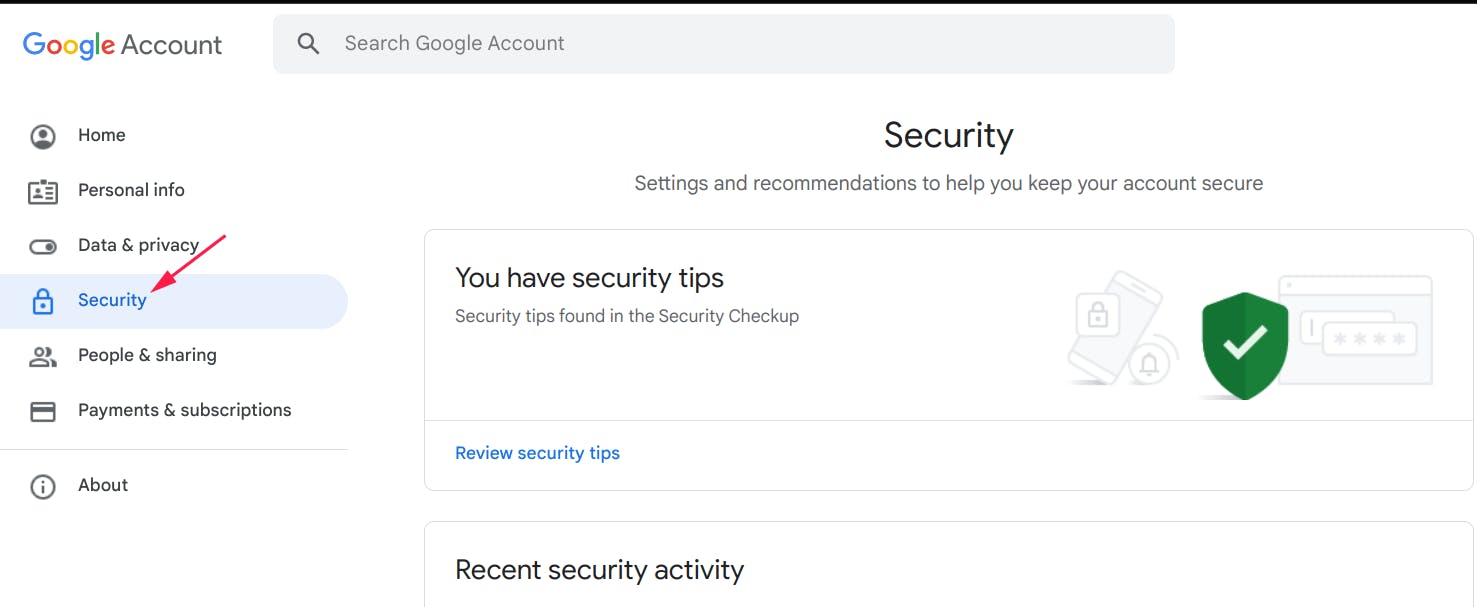
Security
2-step verification
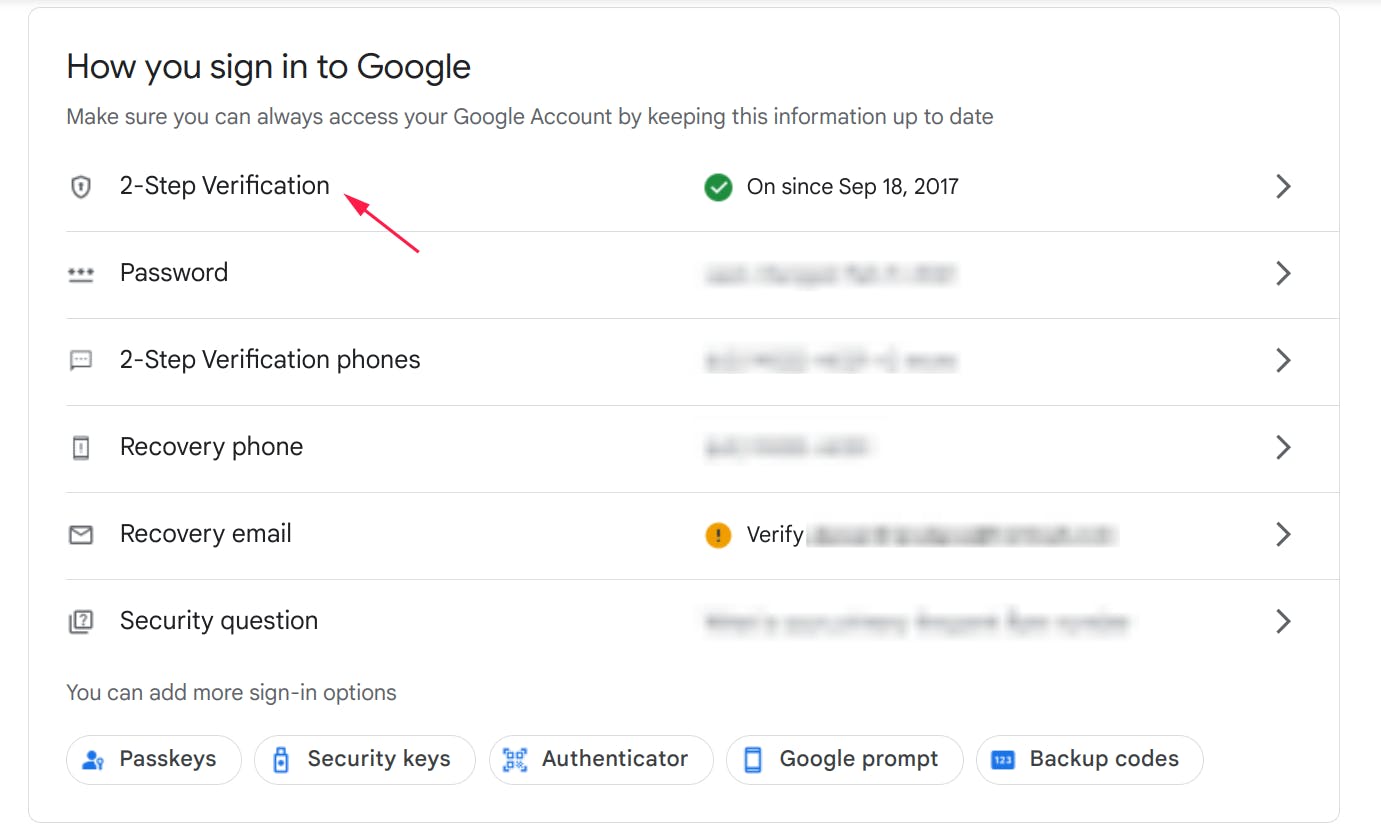
You might be required to log in again.
App Passwords
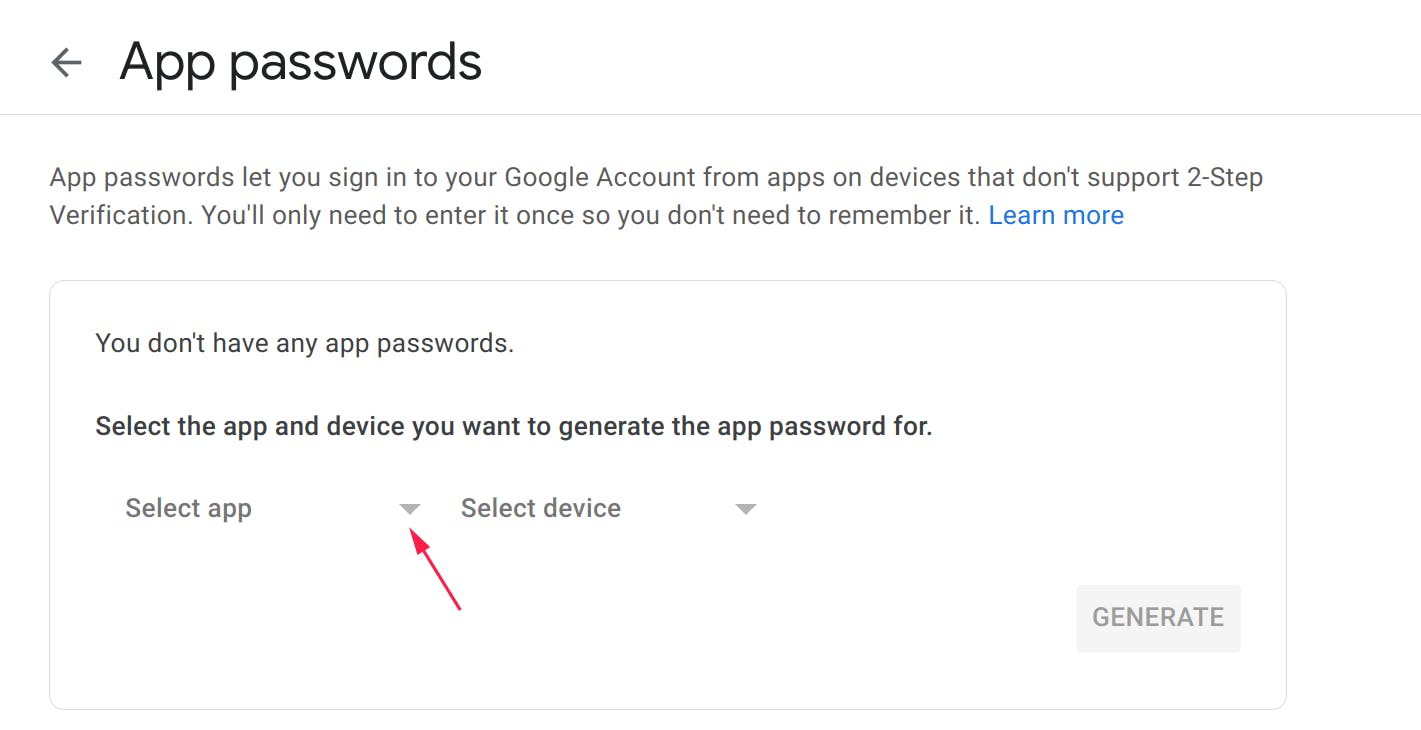
Scroll down and you'll see "App Passwords". Click on it.

App name
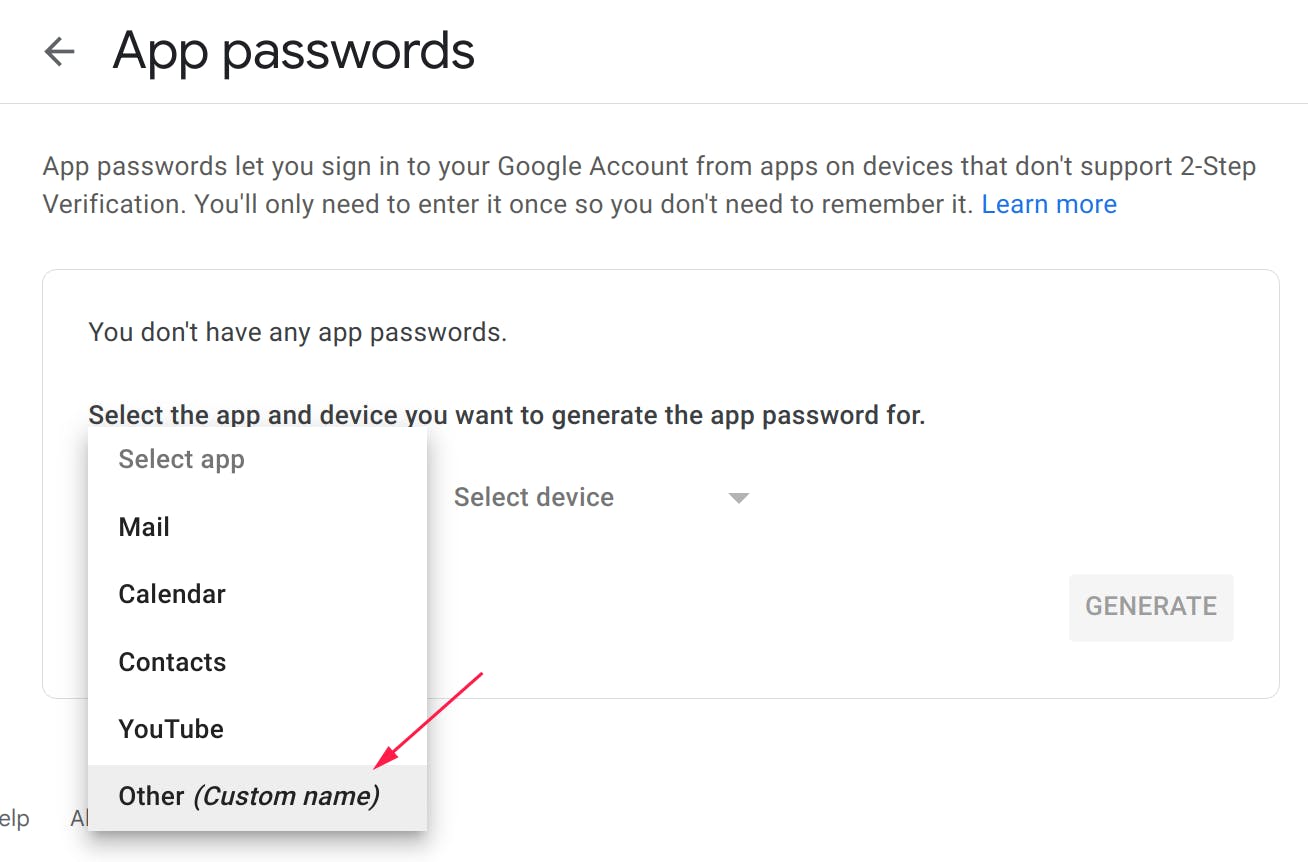
In Select app, choose and write your app name.
Other (Custom name)
Choose the name
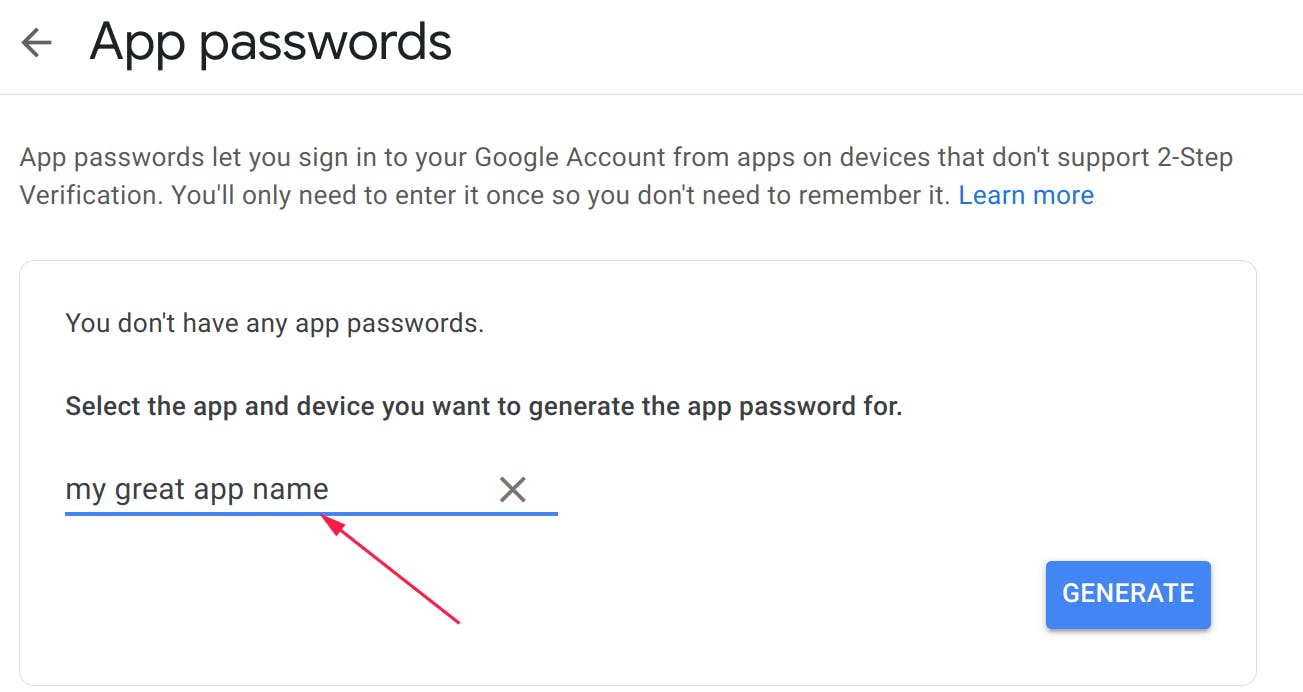
Generate the App password
Your generated password should appear like the following picture
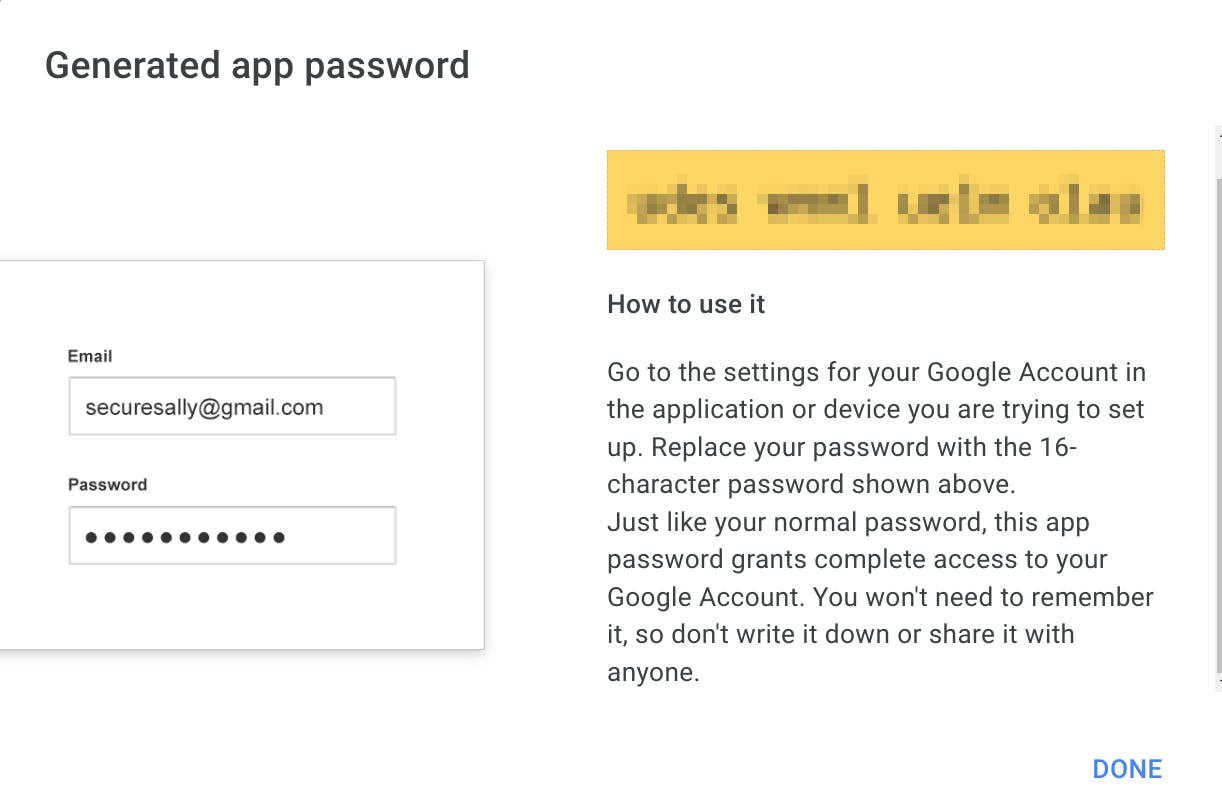
Copy the new password to a plain text file or to your IDE.
Let's come back by clicking on DONE.
Configure SMTP settings
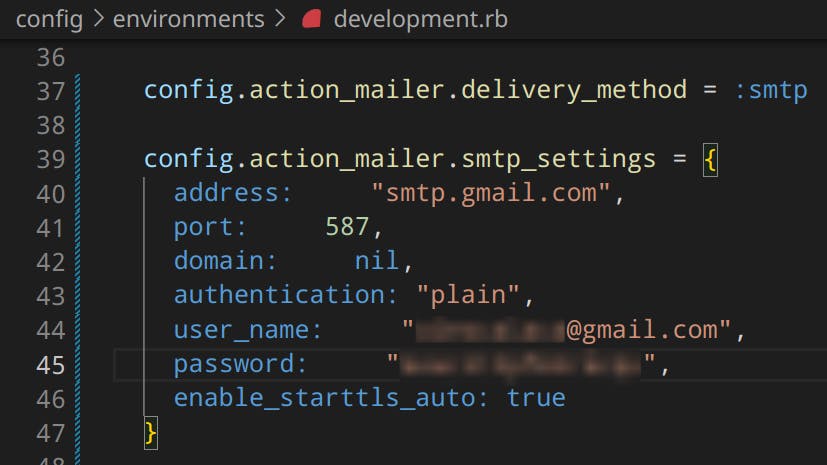
Go to config/environments/development.rb and replace your current password with the 16-character password generated by Google.
Celebrate
You've made it! You rock!

Let's become business friends
Final thoughts
I hope this article helped you. Let me know if you have any questions.
Your thoughts, suggestions and corrections are more than welcome.
By the way, feel free to drop your suggestions on new blog articles.
Hope to see you next time.

